
Symplectic Elements FAQs
Frequently asked questions for Oxford users of Elements
Access, user roles and logging in
Elements at Oxford is accessible at https://oxris.ox.ac.uk/. Sign in using your Oxford single sign-on (SSO) credentials. If you are unable to access Elements via your SSO credentials you must register for an account.
Users affiliated with the University but without single sign-on (SSO) credentials should request virtual access from the University Card Office authorised through their department, college or unit.
Research staff employed by the University
Your name and title details are fed directly from the CoreHR system. You can check your details via HR Self Service. Please contact HR to request a change and this will feed through to Elements.
If you publish using a name not recorded in the HR system, for example your maiden name, you can add a preferred first and/or last name in Elements that will override the name that was imported for you. See our guide to Set a preferred name
College only researchers, students and administrative staff
Your details should have come from the new user request form you completed when you requested an Elements account. To amend or correct your details, please email the SE Helpdesk at symplectic@admin.ox.ac.uk.
If you have forgotten your single sign-on (SSO) credentials or your SSO has expired, please visit the IT Services help web pages.
A delegate in Elements can impersonate another user and assist with managing their account. Full guidance on adding a delegate and impersonating can be found in our guide: Add a delegate
A delegate can carry out any action on behalf of the user they are impersonating (except for delegating). This includes depositing an item or claiming or rejecting a publication.
A research manager can do more than manage their own Elements account. They can impersonate all users in an Elements group such as a department, merge records, claim and reject records, and amend search settings. They can email all users in the group and amend default settings for the group. They also have access to the Open Access Monitor.
A group statistician can run basic reports for a group.
To request research manager access, email symplectic@admin.ox.ac.uk and copy in your line manager or head of administration by way of authorisation.
Research managers and statisticians are jointly known as group managers.
| Type of users | Account creation | Users details updated | Account deactivated |
|---|---|---|---|
| Staff employed by the University on a research contract | Automatic | Automatic | Automatic |
| Staff employed by the University not on a research contract eg administrative staff | Manually by Symplectic Admin | Automatic | Automatic |
| Staff not employed by the University eg DPhil student, college only staff | Manually by Symplectic Admin | Manually by Symplectic Admin | Automatic |
You can impersonate another user if:
- You are a named delegate for that user
- The user is a member of a group (e.g. department) of which you are a group manager
You can impersonate them by clicking on impersonate icon at the top of the screen and entering their surname (optionally followed by a comma, space and initial e.g. 'Jones, J') :

For further details please see user guides:
Searching, harvesting and claiming research outputs
Names and name variants can be changed on the name-based search settings screen.
From the menu navigate to My profile > Settings > Name-based search.
On this screen, you can add or remove name variants, choose a date to begin searching from and select which databases to search.
Full guidance on search settings can be found in our guide: Modify search settings
To clear pending publications, click on the bullet point icon on the research outputs tile and select clear pending.

The notifications component on the Elements header replaces the reminders.

Notifications include information about
- pending publications
- pending grants
- files found
- additional information needed
Firstly, check your search settings, particularly if you have a common name. You can refine your search settings (Menu > My Profile > Settings > Name-based Search) to reduce the number of suggestions arriving in pending. See user guide: Modify your search settings
Then, clear your pending items from the Research Outputs tile on the Homepage - using the 'three dots' menu at the top right of the tile. See FAQ: How do I reset pending publications?
When it next searches, Elements will do so using your modified search settings and repopulate your pending items list. To run searches quicker, click 'run my searches' on the search settings page.
You can also take advantage of automatic claiming using your ORCID and other individual identifiers found in publication metadata from publishers. Go to Menu > My profile > Settings > Automatic claiming. See user guide: Add your ORCID
Elements finds publications from external data sources using both author identifiers (ORCID, Scopus ID) and name based searches.
If you have claimed your ORCID (or other identifiers) in Elements it can automatically claim outputs with your that identifer in their metadata (please remember to use your ORCID when submitting papers). See the user guide Add your ORCID
It will additionally carry out a name based search of external sources.
If key papers are not coming into your pending list you should check and refine your search settings. See our user guide: Modify search settings
If the item still does not appear in pending as it is not available in any external data sources you can:
-
add it manually
- On your homepage, click '+ ADD NEW' in the research outputs tile
- Select output type from the pop-up
- Add the title to the search field and if not found click go to next step at the foot of the screen
- Enter details and save
-
import from a file (EndNote, Reference Manager)
See our user guide: Import publications
Firstly, you should check your search settings to help it efficiently find your publications:
You can then keep up to date by 'acting on acceptance' (adding new publications as soon as they are accepted) and claiming other publications which appear on 'pending'.
Also be aware that you can make your previous publications record complete by importing all your publications from a referencing software such as Endnote or Reference Manager.
Firstly, check that you have selected the all tab rather than recent (default). If this does not resolve the issue it may be that publications are appearing at the bottom of the list – see ‘I have acted on acceptance but recent articles are not appearing at the top of my list’.
UTF-8 is supported, and preserves special characters within Elements. You can search by title using special characters. However, when uploading a file for deposit to the Oxford Research Archive (ORA) please use only alphanumeric characters in the filename as this can cause problems with deposit.
If you experience any other issues please notify the helpdesk: symplectic@admin.ox.ac.uk
There are various ways, but the easiest is to click '+ ADD NEW' in the 'Research outputs' tile on the homepage.
- Select the output type from the pop-up.
- On the next screen, add the title of your output to the search field. If the output is not found, click 'go to next step' at the foot of the screen.
- Enter the details of your output and save.
Changes to ORA data are usually reflected in Elements within a couple of hours, but you can force a refresh as follows.
- Go to 'My research outputs' via the Elements menu: My profile > My work > Research outputs, or click 'Research Outputs' in the Research outputs tile on the homepage.
- Find the stub of the publication that requires refreshing by filtering the list by title.
- Focus on the Deposits tab.
- Click the recycle icon on the right of the stub:

- The new ORA data will be harvested by Elements.
Note: there is a similar 'recycle' icon you can use that is in the 'Repository' tab on the research output details page.
Enter this as output type 'Edited Book’ (since it will have an ISBN). If you have also contributed an article to a special edition of a journal, record this separately as a journal article.
Theses deposited into ORA are harvested into Elements, where the author has an Elements user account. They will appear in authors' pending lists unless automatically claimed (where there is an identifier such as ORCID or email).
There is however no ability to deposit theses via Elements as this should be done directly via ORA.
Theses can be hidden from web profiles if required by using privacy settings. See User Guide.
If you have a particular need to deposit a non-Oxford thesis to Elements and/or ORA please contact the Symplectic Helpdesk.
Managing publications
You may import a BibTeX file or RIS file of your publications to Elements by using the import option: menu > My profile > Tools > Import research outputs.
Full guidance on importing publications can be found in our guide: Import publications
Where there are duplicate records for the same output, you can combine them into one record.
Please see our guide: Merge duplicate publications
If you have already claimed a record but need to add a date of acceptance (DOA), you do this by creating a manual record or amending the existing one. This will add the DOA to the data held for the publication.
In summary:
- Find the item on the 'My research outputs' screen (Click Research Outputs link on the home page tile or Menu > My profile > Research outputs)
- Open the Research output details page by clicking on the title
- In the Data Sources section, if there is an existing manual record click the pen icon ('Edit record'). If there is no manual record in the Data Sources section then at the bottom right of that section click the + sign in a blue circle ('Add manual record').
- Add the date of acceptance
- Click the blue 'save' button at the bottom of the screen
Please note that when you add a manual record, it will initially use data from the highest precedence or preferred source, and will automatically be set as the 'preferred source' for reporting.
For full details see our guide: Add a date of acceptance to a claimed publication
You can create a manual record (or edit an existing one) and then enter the correct data.
In summary:
- Find the item on the 'My research outputs' screen (Click Research Outputs link on the home page tile or Menu > My profile > Research outputs)
- Open the Research output details page by clicking on the title
- In the Data Sources section, if there is an existing manual record click the pen icon ('Edit record'). If there is no manual record in the Data Sources section then at the bottom right of that section click the + sign in a blue circle ('Add manual record').
- Important: if you are correcting external data, click the blue star icon ('Set preferred record') on the manual record to prevent it being overwritten.
- If you are adding in a date of publication, you will also need to enter a date of acceptance, as it is a mandatory field.
- Click the blue 'save' button at the bottom of the screen
Please note that when you add a manual record, it will initially use data from the highest precedence or preferred source, and will automatically be set as the 'preferred source' for reporting.
For full details see our guide: Amend a claimed publication
If you are entering data about a book as the editor, you should use output type 'Edited Book' (editor is a required field). If you are entering data about a book as the author, you should use output type 'Book' (author is a required field).
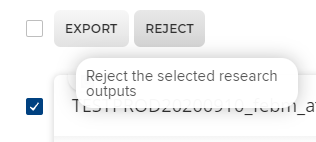
You can ‘reject’ an item you have previously claimed.
- Find the item on the My research outputs screen
- Tick the check box to its left to select it
- Click the reject button at the top of the page
Please note that if you reject an item, you can claim it from you list of rejected items.
If you have already claimed the record of an output, but need to add a date of acceptance, you need to create a manual record or amending an existing one.
In summary:
- Find the item on the 'My research outputs' screen (Click Research Outputs link on the home page tile or Menu > My profile > Research outputs)
- Open the Research output details page by clicking on the title
- In the Data Sources section, if there is an existing manual record click the pen icon ('Edit record'). If there is no manual record in the Data Sources section then at the bottom right of that section click the + sign in a blue circle ('Add manual record').
- Add the date of publication
- Add the date of acceptance if missing (required as it is a mandatory field)
- Click the blue 'save' button at the bottom of the screen
Please note that when you add a manual record, it will initially use data from the highest precedence or preferred source, and will automatically be set as the 'preferred source' for reporting.
Where a publication has data available from multiple sources, Elements has a predefined ‘order of precedence’, which determines which source is used when selecting data for display, for example title and dates. The top 7 sources in order of precedence are:
- ORA
- EPMC
- PubMed
- WoS Lite
- Scopus
- Crossref
- Manual
You can also set your own preferred data source to be used in reports about your publications. Do this by clicking the star icon ('set preferred record') for the data source on the research output details page.
Preferred or highest precedence records are also relevant to the display of data on departmental web profiles, which normally use data from the preferred or highest precedence source.
Please note that when you add a manual record, it will initially use data from the highest precedence or preferred source, and will automatically be set as the 'preferred source' for reporting.
Elements has a defined order of precedence for external data sources. Where a publication has data records available from multiple external data sources, this precedence determines which record is used when selecting data for display in reports, publications listings, and the open access monitor.
Where the listing or report relates to an individual user, the precedence can be overridden by a user setting a ‘preferred record’. See the FAQ 'What does setting a preferred record do?'.
The top 7 sources in order of precedence are:
- ORA
- EPMC
- PubMed
- WoS Lite
- Scopus
- Crossref
- Manual
Preprints usually have a separate DOI so should be a separate item in Elements. If a preprint you claim in Elements is later published, please remember to act on acceptance.
Create a new record in Elements for the journal article and deposit the accepted manuscript.
These may be harvested from external data sources as separate records with different Digital Object Identifiers (DOI) from the original publication. We recommend that you do not merge with the original.
However, if you do not want the output to display on public facing platforms such as a department website, you can update the privacy setting of your relationship with the output in Elements:
- Find the item on the 'My research outputs' screen
- Click on the globe icon

- Select 'Internal' for the output’s relationship privacy

If you do not want to retain the output in your list of My research outputs in Elements you can reject it. See the FAQ: How do I 'unclaim' a publication I have previously claimed?
There is a need to distinguish between the abstract as a research output in its own right, and the related presentation or conference paper that it may refer:
- if the Elements record is intended to refer to the abstract itself (for example in a conference-specific issue of all the abstracts), then this will not normally be a research output and does not need to be in Elements – you should therefore unclaim/reject it
See FAQ: How do I 'unclaim' a publication I have previously claimed? - if the Elements record is intended to refer to the presentation that the abstract describes, change its output type to 'Presentation' – there will be no reminders to deposit since presentations are not in open access policy
See FAQ: How do I change or correct the output type? - if the Elements record is intended to refer to the conference paper that the abstract is a precursor of, keep or change to type 'Conference paper' – this will act as a prompt for reminders to deposit to the Oxford Research Archive (ORA) (assuming ISSN is also populated)
- if the abstract is a research output in its own right, and the user wants it to be on their record, then it should be either output type 'Other' or ‘Conference paper’ (the latter will trigger a reminder to deposit if there is also an ISSN recorded)
If you are entering a book as the editor, please use type 'Edited Book' instead. Author is not required for this output type.
To change output type:
- Find the stub of the research output you want to modify on the 'My research outputs’ screen (Menu > My profile > My work > Research outputs)
- Click on the pen icon to the right of the output type

- Select the correct output type from the pop-up menu and click ‘Save’
Yes, When adding an author to the metadata, you have the option to record their contribution at a more granular level than ‘author’. This aims to recognise diversity of talents and skills and value a broad range of contributions to excellence in research (as per the ‘Valuing contributions’ priority area of the Research Culture programme at the University).

Yes, Elements has a full range of privacy settings to control what is able to be displayed on public websites.
Privacy settings are as follows:
- Public - Data can be made available anywhere
- Internal - Data can be made available in Elements only
- Private - Data cannot be made available anywhere
You can set the following:
Object privacy on a research output or other object - use this to hide everything about that object for everyone (including all other linked users).
Relationship privacy - use this to hide a publication from your personal listings.
Profile privacy - use this to hide all your data - information about you and your publications (and other objects)
Privacy on individual profile fields - use this to hide specific profile data
Please note that privacy settings are not related to the embargo of papers deposited in ORA. The ORA Review team will continue to check embargo conditions before releasing.
Please see our ‘Privacy settings’ user guide for further details.
Example: controls to set object or relationship privacy for a publication, via Menu > My profile > Research Outputs:

Controls to set profile privacy, via Menu > My profile > About Me > Edit Profile:

By making an object in Elements such as a research output, grant or professional activity a ‘favourite’ you will improve the visibility of it in Elements and on public facing platforms that use favourites such as Research@Oxford and some department websites.
There are various ways you can make an object in Elements a favourite. In this example, you will favourite a publication listed on the Research Outputs page
- Navigate to the relevant page to view all your research outputs, grants, or professional activities, e.g. Menu > My Profile > My Work > Research Outputs
- Identify, an item in the list you want to favourite, and click on the heart icon (outline) to mark it as a favourite:

- When you have selected the item as a favourite, the heart shape is filled:

- You can now filter your list of outputs in Elements by favourite status:

- Similarly, a user of Research@Oxford has the option to filter a researcher’s list of outputs by selected (favourites) first:

- If you want to deselect an item as a favourite, click on the heart again:

Following the upgrade to v6.12, privacy options for the re-use of data from Elements are surfaced more prominently at the top of the manual record when Acting on Acceptance:

Privacy settings relate to the reuse and display of data from Elements (e.g. in Research@Oxford or departmental websites).
See FAQ Can I prevent my Elements data appearing on University websites?
Please note that privacy settings are not related to the embargo of papers deposited in ORA. The ORA Review team will continue to check embargo conditions before releasing.
Elements is primarily a database of research outputs. Therefore, the most straightforward course of action would be not to claim a non-research output - either reject it (from pending list, if suggested) or 'unclaim' it (from publications list e.g. if already automatically claimed).
If you would still like such an item to appear on your Elements account, please be aware that:
- it may appear on the publications listing on your departmental/faculty website. You can control this by setting object privacy to 'internal' or 'private'. See FAQ 'How can I prevent my Elements data appearing on University websites?'
- it will appear in open access monitoring as if it were a peer reviewed journal article that needed to be deposited to ORA to meet open access policies, and you may be reminded to deposit. You can correct this by changing output type to 'other'. See FAQ 'How do I change or correct the output type?'
Act on acceptance and open access
If the publication has no recorded acceptance or publication dates, then by default Elements will place it at the end of lists of claimed outputs. Some pages let you sort by different fields.
To add dates see our user guide: Amend a claimed publication
Please note that the sorting of listings in Elements does not necessarily bear a relation to other reports such as departmental webpages.
No. This means the item has been deposited and is awaiting review by the ORA team. Once the item has completed review and is made public via ORA, status will change to 'Live'.
No. By depositing the AAM, you have met the requirements of 'Act on Acceptance' and you do not need to submit a later version.
However, should you wish to deposit a corrected or additional paper to ORA, click the ‘Redeposit' link, which is found in the Repository section of the research outputs details page, see image below.

You will be taken to the deposit page where you can click ‘Choose File’ in the ‘Prepare redeposit’ section. Follow the usual remaining steps for deposit.
Please email ORA at ora@bodleian.ox.ac.uk with any relevant background information if needed.
Although it might not be obvious, Elements does not actually store papers - when deposited they are passed directly to ORA (the Oxford Research Archive).
Please rest assured that ORA will only make the correct papers available in line with publisher terms, so you do not need to delete incorrectly deposited papers.
However, should you wish to deposit a corrected paper, click the ‘Redeposit' link, which is found in the Repository section of the research outputs details page, see image below.
You will be taken to the deposit page where you can click ‘Choose File’ in the ‘Prepare redeposit’ section. Follow the usual remaining steps for deposit.
Please email ORA at ora@bodleian.ox.ac.uk with any relevant background information if needed.
Deposit reminders indicate where Elements thinks that a publication may be in scope of open access policy. Where the dates of publication and acceptance are missing, the system will provide a reminder on the basis that the publication could be in scope. In this situation you can prevent further reminders by entering the correct publication date.
In summary:
- Find the item on the 'My research outputs' screen (Click Research Outputs link on the home page tile or Menu > My profile > Research outputs)
- Open the research output details page by clicking on the title
- In the Data Sources section, if there is an existing manual record click the pen icon ('Edit record'). If there is no manual record in the Data Sources section then at the bottom right of that section click the + sign in a blue circle ('Add manual record').
- Add the date of publication
- Add the date of acceptance if missing (required as it is a mandatory field)
- Click the blue 'save' button at the bottom of the screen
After deposit
There is no notification email of a successful deposit to the Oxford University Research Archive (ORA). However, on deposit of your AAM to ORA via SE, a record for your work is automatically created in the repository displaying the details you entered in the deposit form (title, author, journal title etc). The full text is not visible immediately in the repository as it transfers to ORA under embargo. ORA staff receive notification of the deposit and review the deposit details including:
- confirm the correct file version has been deposited (AAM not publisher PDF)
- check and enhance bibliographic details (adding abstract, keywords, additional author information, links to the publisher website, publisher statement etc)
- check funder information (correctly acknowledged and policy with regard to embargo periods)
- check publisher information (self-archiving details, open access (OA) policy and embargo requirements)
- check REF open access policy information (embargo policies meet REF expectations)
- pass article processing charge (APC) requests onto the APC team (other responsibilities with regard to funders, APCs and Creative Commons licensing are not dealt with by the ORA team)
Once the deposit has been reviewed, ORA review staff will send you the link to the item in the repository and/or contact you with any queries arising from deposit.
After publication
ORA review staff will apply the embargo period given in the publisher policy to the deposited AAM from the date of publication. The version permitted to be OA under the publisher’s self-archiving policy will be released at the end of this embargo period. If your work has been published OA (ie you have paid an APC) and the publisher PDF can be used, ORA review staff will download this from the publisher website and release the file in ORA – the AAM should however still be the version deposited. At the end of the embargo period ORA review staff will enhance the ORA record with any further information resulting from publication (page numbers, journal volume/issue details, DOI, etc).
ORA review staff will not contact you again at the end of the embargo period. The file will be released at the URL provided at first review.
For queries regarding a deposited AAM contact ora@bodleian.ox.ac.uk
The most common cause of deposit errors is non-alphanumeric character(s) in the filename. We have found that hyphens and apostrophes are particular culprits. Please remove these and try again.
Large files can take several minutes to upload but there is no limit to the size of file you can deposit.
If the error persists, please send the file and the date of acceptance – if available – to symplectic@admin.ox.ac.uk.
If you need to deposit a different version or additional file to ORA, you can do so via the deposit page. Click ‘View’ on the publication page, see image below.

You will be taken to the deposit page where you can click ‘Choose File’ in the ‘Prepare redeposit’ section. Follow the usual remaining steps for deposit.

n.b. you do not need to delete an incorrectly deposited file as files will only ever be made available having been carefully reviewed.
Grants
The grant either does not exist in Elements, or it exists and you are not linked to it.
Currently, Elements holds any grant (excluding studentships) in Oracle Financials (R12) from:
- funders of funding type Research Council or UK/EU/non-EU charity
- other funders that use Researchfish
- University of Oxford’s John Fell Fund, Strategic Research Fund, Strategic Innovation Funds
- European Commission (including ERC)
Grants in Researchfish are imported subject to a matching funder reference in Oracle.
Researchfish is the outcomes reporting tool used by a wide range of funders including UK research councils.
Once a grant is imported, you will be linked to a grant if:
- you are associated with that grant in Oracle Financials (or in Researchfish) and
- you can be identified by your SSO (Oracle Financials data) or University email address (Researchfish data)
To check whether a grant is imported into Elements but not linked to you, use the system search (Menu > Reporting > Search > System search. If there are too many results you can restrict the search to grants using the ‘Advanced’ search.

If a grant is not in Elements at all but you think it should be, please email the helpdesk with the Oracle Financials reference of the grants concerned: symplectic@admin.ox.ac.uk
If a grant exists in Elements (you see it on a publication record or find it via a system search: Menu > Reporting > Search) that you should be linked to as a PI or researcher but are not, please contact someone already linked to it (principal investigator if there is one recorded). To identify them, click on the relevant grant to take you to the grant detail page. Halfway down that page you will see ‘Connections to other people and elements’, and go the ‘Users’ section.
Links between grants and users are initially imported from Researchfish and Oracle Financials where the user’s details in Elements are matched by SSO (Oracle Financials) or email (Researchfish). Links can also be created by any user already linked to the grant.
To be linked to a grant please contact one of the users already linked to it – the principal investigator if there is one recorded. To find the names of users already linked go to the grant detail page, go down to the ‘Connections to other people and elements’ section and find the ‘Users’ field.
If there is no one already linked to it, please email the helpdesk: symplectic@admin.ox.ac.uk
Not all of them. You can create links from grants to publications but you will still need to log into Researchfish to complete the other required information and to submit.
Links you create in Elements will be exported to the Researchfish system every January, so you will not have to re-enter data for the UKRI Researchfish collection in February or March of that year.
New grants are imported from Oracle Financials (and Researchfish) once a month.
If you are linked to a grant this is because you are associated with it either in Oracle Financials (as project manager or task manager) or in Researchfish (as PI).
If you wish to unlink yourself, you should email symplectic@admin.ox.ac.uk in order to have the source data amended.
If you unlink in Elements without amending the source data, you will be ‘linked’ to it again during the next import of grant data.
At the moment we do not import data on studentships.